Two people can stitch the same chart with the same floss and get pieces that look quite different. The difference is rarely talent – it's a handful of small habits. Here are the ones that matter most.
Make every top stitch go the same way
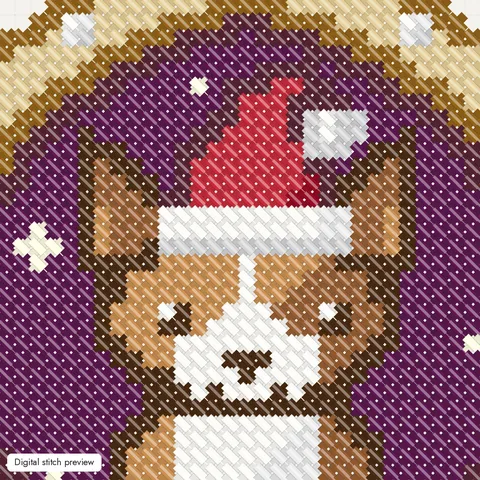
This is the single biggest thing. A full cross is two diagonal stitches, and the second one sits on top. If every cross has its top stitch leaning the same way, the light catches them all the same and the stitching looks smooth and even. Mix them up and the surface looks patchy, even if nobody can say exactly why.
It doesn't matter which direction you choose – only that you stick to it for the whole piece. A common habit is to stitch the bottom leg from lower left to upper right ( / ) and the top leg from lower right to upper left ( \ ). If you turn your work around while you stitch, check the direction again when you turn it back. You'll find more on the stitch itself in full stitch, half stitch and backstitch.
Keep an even, relaxed tension
Pull each stitch just until it lies flat on the fabric, then stop.
- Too tight and the holes stretch, the fabric puckers and the stitches look thin.
- Too loose and the stitches bulge, loop or snag.
Holding the fabric in a hoop or frame makes even tension much easier, because the fabric can't bunch up as you pull. See hoops and frames for which one suits your project.
Let the needle dangle to untwist the floss
Every stitch adds a little twist to your floss. After a while the strands wind round each other, the stitches look thin and ropey, and the thread starts to knot. Every few stitches, turn your work over and let the needle hang freely. It will spin until the twist is gone. You can also give the needle a small roll between your fingers in the opposite direction to the twist as you stitch.
Separate your strands first
Before you thread up, pull the strands of floss out of the bundle one at a time and then lay the ones you need back together. They sit side by side instead of being twisted together, so they cover the fabric better. The needle guide shows how to do it without tangles, and which needle size to use.
Railroading, explained simply
When you stitch with two strands, they can still twist round each other as they lie on the fabric. Railroading keeps them flat and parallel, like the two rails of a railroad track.
- Bring the needle up as usual.
- Before you take it down for the top stitch, slide the needle between the two strands lying on the front of the fabric.
- Go down into the hole as normal. The needle parts the strands so they lie side by side.
It's slower, so many stitchers railroad only the top stitch, or only where smoothness really shows, like a large block of one color. A laying tool does a similar job. Either way, it's optional.
Don't carry thread across gaps
On the back of your work, it's tempting to jump straight to the next patch of the same color. Over a short distance that's fine, but a long strand across unstitched fabric can show through to the front, especially dark floss behind light fabric, and it can snag or pull the stitches out of shape.
As a rule of thumb, don't carry across more than three or four empty squares. For longer gaps, either end the thread and start again, or weave it under stitches already on the back to get there. Starting and ending threads explains how to do both neatly without knots. Trim tails close, too – loose ends can get caught in later stitches or show through the fabric.
Rows or one at a time?
There are two ways to work full crosses, and both give a neat result.
| In rows | One at a time | |
|---|---|---|
| How | Stitch a row of half stitches, then cross them all on the way back | Complete each cross before moving on |
| Best for | Blocks and rows of one color | Scattered single stitches, diagonal lines, confetti |
| Feels | Fast and rhythmic | Careful and precise |
Most stitchers mix the two: rows for larger areas, single crosses for scattered stitches. Whichever you use, the top stitches must still all lean the same way. When you're working in rows, it helps to finish crossing a row before you start the next one, so you don't lose track of which stitches are only half done.
Stitch in good light
Good light makes it much easier to see the holes, count accurately and spot a mistake early. Daylight is best; in the evening, a daylight lamp gives clearer colors than ordinary room light, so similar shades are easier to tell apart. A magnifier helps on higher counts like 18 ct Aida or 28 ct linen, and on dark fabric. On dark fabric, a white towel on your lap shows the holes clearly.
If you do spot a stitch going the wrong way or a miscounted square, it's usually quick to put right. See fixing cross stitch mistakes.
Wash and press at the end
Even very neat stitching looks better after a gentle wash and press. The wash removes hand oils and hoop marks, the stitches relax and plump up, and pressing face down on a fluffy towel flattens the fabric without crushing the stitches. Our washing, pressing and framing guide takes you through it step by step.
Next: How much fabric do I need?.
Frequently asked questions
Does it matter which way cross stitches cross?
Yes. It doesn't matter which direction you choose, but every top stitch should lean the same way. Mixed directions catch the light differently and make the stitching look uneven.
Why does my cross stitch look messy?
The usual causes are top stitches going in different directions, uneven tension and twisted floss. Fix those three and most stitching looks much neater straight away.
What is railroading in cross stitch?
Railroading means passing the needle between the two strands of floss before you take it down, so the strands lie flat and side by side instead of twisting. It gives a smoother look but is optional.
How far can you carry thread on the back of cross stitch?
Generally no more than three or four squares across unstitched fabric. For longer gaps, end the thread and restart, or weave under existing stitches on the back so it can't show through.
Is it better to cross stitch in rows or one stitch at a time?
Both work. Rows are faster for blocks of color; single stitches are better for scattered stitches. Keep the top stitch direction the same either way.
Should I wash my cross stitch when it's finished?
Usually, yes. A gentle wash in cool water with a mild soap, followed by pressing face down on a towel, removes hoop marks and hand oils and makes the stitches look fuller.