Cutting fabric too small is one of the few cross stitch mistakes you can't fix: once the design is stitched, there's no adding an extra inch around it. Luckily the sum is simple. Here's how to work out the right size and get the fabric ready.
Step 1: work out the design size
Every pattern has a stitch count – the number of squares across and down. Divide each by the count of your fabric:
Design size (inches) = stitches ÷ fabric count
On evenweave or linen stitched over two, use half the thread count: 28 count over two works like 14 count. Our pattern covers already list the finished size on 14, 16 and 18 ct Aida and 28 ct linen, so you can usually skip this step. The fabric count guide has a calculator for anything else.
Step 2: add the margins
The margin is the plain fabric around the design. It gives you room for a hoop or frame while you stitch, and enough fabric to mount and frame the piece at the end.
| How you'll finish it | Margin on each side |
|---|---|
| Standard framing | 3 inches (7.5 cm) |
| Large frame, wide mat or a big design | 4–5 inches (10–12.5 cm) |
| Display in a hoop | Enough to fit the display hoop, plus 1–2 inches (2.5–5 cm) beyond it |
| Small ornaments and cards | 2 inches (5 cm), as long as it still fits your stitching hoop |
The usual rule of 3 inches on every side means adding 6 inches to both the width and the height – enough for lacing or taping the fabric over a board. If you're not sure how you'll finish a piece, be generous: you can trim extra fabric, but you can't add it back.
For a hoop display, choose the hoop first. The design should sit comfortably inside it, and the fabric must reach an inch or two beyond the hoop all round so you can gather it at the back. A design that suits a 6-inch hoop needs a piece of at least 9–10 inches square.
A worked example
Say a pattern is 140 stitches wide and 100 stitches high, and you're stitching it on 14 ct Aida to frame.
- Width: 140 ÷ 14 = 10 inches (25.4 cm).
- Height: 100 ÷ 14 = 7.1 inches (18.1 cm).
- Add 3 inches on every side: 10 + 6 = 16 inches wide; 7.1 + 6 = 13.1 inches high.
- Round up: cut a piece about 16 × 14 inches (41 × 36 cm).
Here's the same design on other fabrics, with 3-inch margins:
| Fabric | Design size | Fabric to cut (at least) |
|---|---|---|
| 11 ct Aida | 12.7 × 9.1 in | 18.7 × 15.1 in |
| 14 ct Aida or 28 ct over two | 10.0 × 7.1 in | 16.0 × 13.1 in |
| 16 ct Aida | 8.8 × 6.3 in | 14.8 × 12.3 in |
| 18 ct Aida | 7.8 × 5.6 in | 13.8 × 11.6 in |
Buying the right piece
Fabric is sold by the yard or meter, in pre-cut pieces and in fat quarters, and sizes vary from shop to shop, so check the measurements against your cut size. For a large design, buy one piece big enough for the whole thing – you can't join fabric invisibly.
Preparing the edges
Aida, evenweave and linen all fray as you handle them, so finish the edges before you start:
- Masking tape folded over the raw edges – quick and needs no sewing. Keep it right on the edge, because the adhesive can leave a mark, and take it off before washing.
- Zigzag stitch along each edge on a sewing machine.
- Serging (overlocking) – the neatest and most durable finish if you have a serger.
- Overcasting by hand – simple whipstitches over the edge with sewing thread.
Finding the center
Starting in the middle keeps an even margin all round.
- Fold the fabric in half from top to bottom and pinch a light crease.
- Unfold, then fold it in half from side to side and crease again.
- The center is where the creases cross. Mark it with a pin or a few small stitches in sewing thread.
On our charts, the center arrows at the edges show the middle row and column. Count to where they meet and that's your first stitch. There's more on this in how to read our charts.
Gridding your fabric
For large patterns, many stitchers mark a grid on the fabric matching the bold line every 10 squares on the chart. You only ever count to ten, and mistakes show up straight away.
- Thread gridding: work a running stitch along every tenth line of holes in a contrasting sewing thread or fine nylon fishing line, starting from the center. Try not to pierce it with your stitches, so it pulls out easily when you're done.
- Fabric markers: a water-soluble fabric pen is quicker. Test it on a scrap first, rinse it out in cool water before you press, and never iron over the marks – heat can set some inks.
- Pre-gridded fabric has a printed grid that washes out.
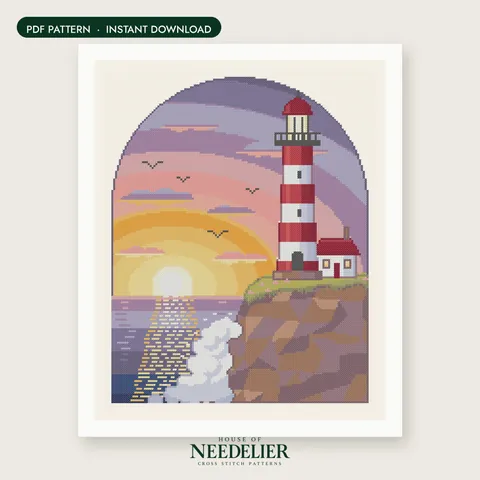
On a big piece like our Lighthouse at Sunset (134 × 170 stitches), gridding saves far more time than it costs. See how to stitch large cross stitch patterns for more planning tips.
Next: Hoops and frames: which one to choose.
Frequently asked questions
How much fabric do I need for cross stitch?
Divide the stitch count by the fabric count to get the design size in inches, then add 3 inches (7.5 cm) on every side. For example, a 70 × 70 stitch design on 14 ct Aida is 5 × 5 inches, so cut an 11 × 11 inch piece.
How much extra fabric should I leave around a cross stitch for framing?
Leave at least 3 inches (7.5 cm) on every side for a standard frame. For a large frame, a wide mat or a big design, 4–5 inches (10–12.5 cm) gives the framer more to work with.
How do I stop Aida from fraying?
Finish the edges before you start: fold masking tape over them, zigzag them on a sewing machine, serge them, or overcast them by hand with sewing thread.
How do I find the center of my cross stitch fabric?
Fold the fabric in half one way and then the other, creasing lightly each time. The center is where the folds cross; mark it with a pin or a few stitches and match it to the center arrows on the chart.
Do I need to grid my fabric?
No, but it helps a lot on large or busy patterns. A grid every 10 squares matches the bold lines on the chart, so you only count to ten and spot mistakes early.